I had seen that one of the other robot groups was doing tethered sumos and it seemed like a good idea. I suggested we have a tethered sumo competition. This would give people a reason to construct a simple robot. I made the claim that I would build a sumo from Axman parts and then write a construction article about. So this is the article.
I went to Axman and got the parts pictured above.
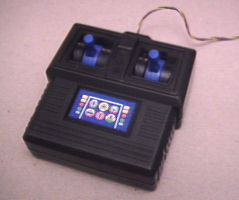
The first is a hand controller from some unknown toy. It was between $1 and $2. It has two DPDT (Double Pole Double Throw) switches and a battery compartment that holds 3 "C" cells. There are four wires that come out. The yellow-blue pair are for one motor and the red-black pair are the other motor. I didn't have to modify the switch box. However you may want to add external power wires if you want to use a higher voltage than the 3 "C" cells give you.
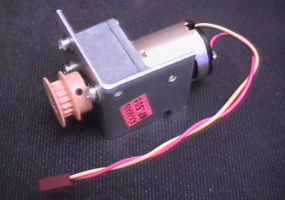
The second thing I got was two gearhead motors. These were $7.50 each. These motors come with a "L" bracket and a plastic pulley.
I needed some wheels to attach to my motors. They needed to have a diameter large enough so the robot frame would have adequate ground clearance. I went to the hobby store and looked through their selection of R/C airplane wheels.
I came home with Du-Bro 2 inch diameter "Low Bounce Shock Absorbing Wheels". The Du-Bro part number is "200T". They were $4.40 for a pair. There was a generic brand that looked identical but were 1 cent cheaper. I bought these because they looked like I may be able to remove the tire from the wheel and use the Axman pulley as the wheel.
After much effort I removed the tire from the wheel. I attempted to put the tire on the pulley. I decided it was much too wide to fit. So I had to figure out another way to attach the wheels. I thought about gluing the wheel directly to the shaft. But that seemed messy and I figured it may not hold. I considered gluing the pulley to the wheel.
The sumo rules I was supposed to be following stated a size of 6" x 6" with unlimited height. But with the motors back to back and gluing a pulley to the wheel would have given me a width of 7-1/2". I needed some way to make the thing a little more narrow.
I played with the pulley and decided to cut it down. I pried the end flange off with an X-Acto knife. The resulting pulley was too large to fit inside the wheel hub. So I used my electric drill as a lathe and cut the plastic down to the aluminum core. I also found the 1/8" diameter hole in the pulley would easily thread for a #6 screw.
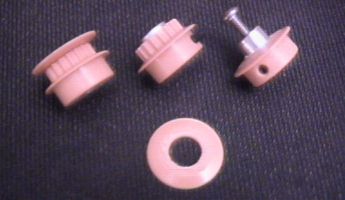
This picture shows the stages of modifying the pulleys. From left to right, original pulley, pulley with end flange removed and finally the pulley turned down and the hole threaded.


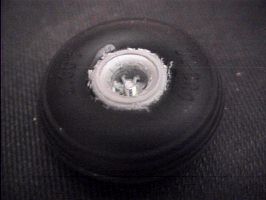
Next I drilled the wheel to accept the modified pulley. I used a 3/8" drill bit in my drill press. I needed to drill a depth equal to the length of the newly exposed aluminum. That is about 3/16" deep. It turns out that is just shy of the center web in the wheel. In the picture you can see that I had a screw through the wheel when I took the picture.
I had problems drilling the wheels. The drill would bind in the plastic and the wheel would spin inside of the tire. So I had to slowly work it until I got it to the depth I wanted. I still had the tire off the second wheel. So I held that wheel with pliers and drilled it. That worked out much better. If you try this, I recommend taking the tire off to do the drilling. This requires a screwdriver or two and much effort.
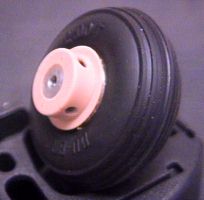
I then used a 1/2" #6 screw to attach the pulley to the wheel. This length leaves about 2 or 3 threads. It would be better to use a 5/8" screw, if they make such a thing. Or drill 1/16" to 1/8" off back side of the wheel. This would give you a few more threads. A dab of epoxy and you would have a permanent assembly. Just be careful so you don't fill the shaft hole with glue. The picture on the right shows the wheel secured to the motor.
The width is still 7" wide by mounting the wheels this way. That is greater than the 6" that the "official" rule dictates. However, since the main goal is to build something and have fun, I am going to declare the "anything goes" class. We have already encouraged people to use R/C cars, or toy tanks as sumos. So this shouldn't be a problem.

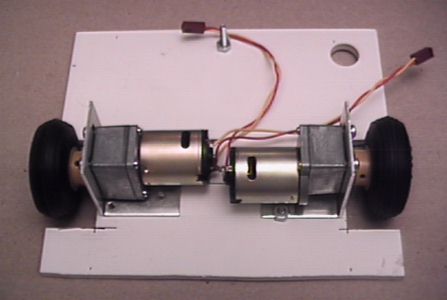
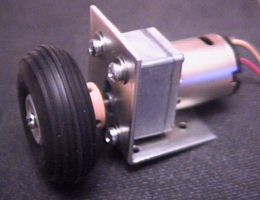
This shows the plastic base plate that I made to hold the motors. This happens to be .236" Sintra. Sintra is an expanded PVC plastic. It is very rigid and also very light. I didn't care about the weight in this case but this stuff is easy to work with. I cut it to 6" x 7". The large hole was already there but it wasn't in the way. I cut two squares out for the wheels. I used a coping saw to cut them and it worked quite well.
I bolted the motors down so the axles were aligned. Then I noticed the screw heads on the bottom were scraping on the ground. Hmmm... I could get some thinner material. An aluminum plate or a piece of scrap PC board would work. Or I could countersink the holes so the screws are flush. But I used another property of the Sintra. I just tightened the screws REAL tight. This pulled the screw heads into the plastic and I had the clearance I was looking for.
With the .236" plastic and 2" diameter tires I have about 1/8" clearance which is good for a sumo. However I would recommend 2-1/2" diameter tires for a more general purpose robot platform. This gives better mobility over uneven surfaces and on carpet.
With 1/8" ground clearance, I used a #6 screw as my castor in the back. The screw head just rubs on the ground.
 To make this a real sumo I would have to add some weight. I think the rule says "3 lbs. or less". It would also need
some sides and maybe a scoop on the front. But this is a good start.
To make this a real sumo I would have to add some weight. I think the rule says "3 lbs. or less". It would also need
some sides and maybe a scoop on the front. But this is a good start.
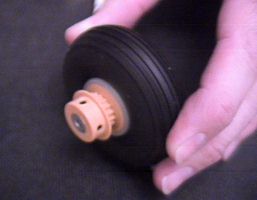
If width is not important you can use an unmodified pulley. Just thread it and screw a wheel to it.
This is a 2-1/2" Du-Bro wheel (part number 250T) and a 1" #6 screw. The screw was slightly too long
so I screwed a #6 nut on before
passing it through the wheel. So the nut just acts as a spacer to make the screw about 1/8" shorter.
And a little epoxy between the pulley and the wheel would make it permanent.

Back to TCRG articles